Classy Llama Supports Ride for Korah

FOR IMMEDIATE RELEASE:
Classy Llama Supports Ride for Korah
SPRINGFIELD, MO (June 2016) – Company Sponsors Cross-Country Ride Raising Funds for Impoverished Families in Ethiopia  

Classy Llama is proud to announce their premier sponsorship of Ride for Korah, a cross-country cycling campaign founded with a mission to raise $50,000 for impoverished families in Korah, Ethiopia.  

The team of 3 friends, Jesse Tyler, Giancarlo Ospina, and Dakota Graff, departed from New York City in early May. The group will be bicycling across nearly 4,000 miles to reach their final destination of Seattle, WA. Tyler explains, “We saw dire need in the community of Korah and chose to use our abilities and resources to raise funds and awareness to help families there.”

Classy Llama is providing essential needs for the riders throughout their campaign. Expenses include food, shelter, and emergency provisions.

Ride for Korah has partnered with I Pour Life based in Springfield, MO. The funds they raise will support I Pour Life’s 10×10 program. The 10×10 program serves women living with leprosy and HIV, equipping them with essential life and business skills. Each woman will be taught a specific trade throughout the ten-month program and will learn to become self-sufficient. The cost for each woman to participate in the program is $1,000, which covers medical expenses, immediate basic living needs, education for children, and emergency reserve.

The sponsorship is part of Classy Llama’s ongoing commitment to supporting those in need.

Kurt Theobald, CEO explains, “Classy Llama invested in Ride For Korah because they carry the essence of our brand in all that they are doing. When you get to the very roots of our brand, it is all about loving the unlovely, pursuing the forgotten, mending the broken. In whatever we do, we want to create value – whether in lives of merchants, or the forgotten people of the landfill called Korah. What’s more, we love empowering others to realize their visions and pursue their dreams. This opportunity was a no-brainer for us; it fires on all cylinders.”

Press Contact:
Jayme Courtney
(417) 866-8887 ext. 109
[email protected]

###

About Classy Llama:
As a full-service eCommerce agency, we have the tools to help you build, grow, and support your Magento site. From full site builds and projects to marketing and site optimization, every engagement with Classy Llama is as unique as the needs of the businesses we serve. We pair high-efficiency, high-visibility processes with dedicated teams and some of the best Magento developers in the world.

About Ride for Korah:
Ride for Korah is a coast-to-coast cycling campaign focused on raising funds and awareness for I Pour Life’s women’s empowerment program in Korah, Ethiopia.

Custom Product Types in Magento 2

Overview

Magento supports a number of product types, each with its own behavior and attributes. This powerful concept allows Magento to support a wide range of industries and merchant needs by mixing and matching product experiences in their catalog.

Even more powerful, however, is the ability for developers to easily add new product types.

In general, when a product class has distinct behavior or attributes, it should be represented by its own product type. This allows the product type to have complex and custom logic and presentation, with no impact on other product types — ensuring that native product types can continue to function as intended.

Implementation

Config XML

As with most things in Magento, the first step to defining a custom product type involves an XML declaration. Specifically, in the <Vendor>/<Module>/etc/product_types.xml, add an XML snippet of the following form to declare the new product type’s critical information.

<?xml version="1.0"?>
<config xmlns_xsi="http://www.w3.org/2001/XMLSchema-instance" xsi_noNamespaceSchemaLocation="urn:magento:module:Magento_Catalog:etc/product_types.xsd">
    <type name="custom_product_type_code" label="Custom Product Type Label" modelInstance="VendorModuleModelProductType">
    </type>
</config>

The type node has three required attributes.

  • name: This attribute defines the custom product code which is used in code and in the database.
  • label: Defines the product type label in the Magento admin.
  • modelInstance: Specifies the fully qualified namespace of the corresponding product type model.

Although there are many other nodes and attributes that can influence the product type definition, this is an example of the simplest case.

Product Type Model

Having declared the product type, the next critical component is the product type model. Each product instance is associated with an instance of the corresponding product type model. This model has the opportunity to modify product type behavior and attributes and is called during many product manipulation processes.

Product Type Model Abstract

A product model must inherit from the MagentoCatalogModelProductTypeAbstractType base class. The base class has only one abstract method: deleteTypeSpecificData. This oddly specific method is called during a product instance save if its type has changed, and gives the original product type the opportunity to clean up any type-specific data before the type change is finalized.

Unless the new custom product type has such type-specific data, the method can be overridden with an empty method.

Finally, although not strictly required, it is conventional for product type models to include a constant with the name TYPE_CODE which defines the product type code string, so it can be referenced in code in a consistent manner.

<?php

namespace VendorModuleModelProduct;

class Type extends MagentoCatalogModelProductTypeAbstractType
{
    const TYPE_ID = 'custom_product_type_code';

    /**
     * {@inheritdoc}
     */
    public function deleteTypeSpecificData(MagentoCatalogModelProduct $product)
    {
        // method intentionally empty
    }
}

Core Product Types

It’s often the case that a custom product type behaves like and has similar requirements of a core product type. In this case, it can be convenient to extend one of the core product types instead of the abstract directly.

The following product type classes are available natively in the core.

  • Simple: MagentoCatalogModelProductTypeSimple
  • Virtual: MagentoCatalogModelProductTypeVirtual
  • Configurable: MagentoConfigurableProductModelProductTypeConfigurable
  • Grouped: MagentoGroupedProductModelProductTypeGrouped
  • Downloadable: MagentoDownloadableModelProductType
  • Bundle: MagentoBundleModelProductType
  • Giftcard (Enterprise Edition Only): MagentoGiftCardModelCatalogProductTypeGiftcard

Results

Once the product type is declared in XML and its associated product type model is created, products of the new type can be created in the admin.

m2 custom product type

Additional Steps

Having successfully created a new product type, there are some common (although optional) steps to fully utilize it.

Associate With Common Attributes

Since product attributes can be scoped to relevant product types, any core attributes which are already scoped will not apply to the new product type. Any such attributes which are indeed relevant will need to be associated with the new product type in an install data script.

<?php

namespace VendorModuleSetup;

use MagentoEavSetupEavSetup;
use MagentoEavSetupEavSetupFactory;
use MagentoFrameworkSetupInstallDataInterface;
use MagentoFrameworkSetupModuleContextInterface;
use MagentoFrameworkSetupModuleDataSetupInterface;

class InstallData implements InstallDataInterface
{
    /**
     * EAV setup factory
     *
     * @var EavSetupFactory
     */
    protected $eavSetupFactory;

    /**
     * Init
     *
     * @param EavSetupFactory $eavSetupFactory
     */
    public function __construct(EavSetupFactory $eavSetupFactory)
    {
        $this->eavSetupFactory = $eavSetupFactory;
    }

    /**
     * {@inheritdoc}
     */
    public function install(ModuleDataSetupInterface $setup, ModuleContextInterface $context)
    {
        /** @var EavSetup $eavSetup */
        $eavSetup = $this->eavSetupFactory->create(['setup' => $setup]);
        
        //associate these attributes with new product type
        $fieldList = [
            'price',
            'special_price',
            'special_from_date',
            'special_to_date',
            'minimal_price',
            'cost',
            'tier_price',
            'weight',
        ];

        // make these attributes applicable to new product type
        foreach ($fieldList as $field) {
            $applyTo = explode(
                ',',
                $eavSetup->getAttribute(MagentoCatalogModelProduct::ENTITY, $field, 'apply_to')
            );
            if (!in_array(VendorModuleModelProductType::TYPE_ID, $applyTo)) {
                $applyTo[] = VendorModuleModelProductType::TYPE_ID;
                $eavSetup->updateAttribute(
                    MagentoCatalogModelProduct::ENTITY,
                    $field,
                    'apply_to',
                    implode(',', $applyTo)
                );
            }
        }
    }
}

This example install script associates price and weight attributes in the $fieldList array with the new product type. Once this install script is run, these product attributes will show in the admin when editing or creating a product of the new type.

Composite Products

When adding child products to a composite product type (grouped, configurable or bundle), the admin interface will only show products where the associated product type has explicitly declared its eligibility to be the child of a composite product. New product types can allow themselves to be children of composite product types by adding a node to the composableTypes node in Vendor/Module/etc/product_types.xml .

<?xml version="1.0"?>
<config xmlns_xsi="http://www.w3.org/2001/XMLSchema-instance" xsi_noNamespaceSchemaLocation="urn:magento:module:Magento_Catalog:etc/product_types.xsd">
    <type name="custom_product_type_code" label="Custom Product Type Label" modelInstance="VendorModuleModelProductType">
    </type>
    <composableTypes>
        <type name="custom_product_type_code" />
    </composableTypes>
</config>

Where To Go From Here

Creating a new product type is only the beginning. Now that it’s defined, the new product type provides an enormous capacity for scoped customization.

Product Type Model Methods

The behavior of products can be significantly influenced by overriding methods in the product type model. This allows custom behaviors to be encapsulated within the product type rather than global observers/plugins.

Some examples of such methods:

  • beforeSave() and save(): these methods run during the beforeSave() and afterSave(), respectively, methods of products of the given type.
  • isSalable(): allows a custom product type to customize product saleability.
  • _prepareProduct(): provides a hook to interact with the info by request when a product is initially added to the cart.

Price Model

In addition to the product type model, a module can specify a price model in the product type definition XML.

<?xml version="1.0"?>
<config xmlns_xsi="http://www.w3.org/2001/XMLSchema-instance" xsi_noNamespaceSchemaLocation="urn:magento:module:Magento_Catalog:etc/product_types.xsd">
    <type name="custom_product_type_code" label="Custom Product Type Label" modelInstance="VendorModuleModelProductType">
    <priceModel instance="VendorModuleModelProductPrice" />
    </type>
</config>

The price model referenced should extend MagentoCatalogModelProductTypePrice. This class has no abstract methods which must be implemented, but allows extending classes to interact with nearly every aspect of price calculation.

Summary

By providing a framework for defining custom product types, Magento empowers merchants and developers to implement significant customization to facilitate business requirements without risking default product behavior.

Why ROI Doesn’t Matter

As marketers, we all are justifying the work we do based on how the data relates to the organization’s return on investment. We know we have to project an estimated ROI before a project even begins and monitor it closely. And if that goal isn’t hit, the project is often deemed a failure. I get it. Money is being spent and stakeholders want to know that it’s not just going down the drain. Data. Analytics. Measure, measure, measure. That thinking is wrong. At least when referring to branding. How do you measure, in dollars, the brand experience? You can’t. And you shouldn’t.

Are you feeling a small panic attack coming on? Maybe questioning my sanity? Let me explain.

Recently at IRCE (Internet Retailer Conference + Exhibition), we handed out a LOT of plush llamas and superhero capes and masks. I was constantly being asked at the event – how do you measure the ROI? The answer: we don’t.

We don’t measure it. We don’t try to calculate it. We don’t worry about clear-cut ROI.

Our company culture is about love, and joy, and families. It’s about giving, not receiving. Some of these people may never be a Classy Kind in Classy CapeLlama customer. And that’s okay.

But if you want to look at this in terms of business, in so many ways this does come back to us. They tweet. They post. They tag. They spread our values around:  the LOVE and the JOY. It causes even our competitors to market for us. All for the cost of an $8 plush, we get photos on 3+ forms of social media all talking about how great we are.  Why?  Because people value the same things we do and recognize the genuineness of our expression.  So I ask you again – How do you measure, in dollars, the brand experience?

Some forms of marketing efforts we do measure; paid search, for example. We track and adjust, we pause and increase budgets, and we drop ads based on CTR and conversions just like any “normal” marketing initiative.

We’re just expressing who we are and loving people, regardless of whether they receive it as love, regardless of whether they think we’re just trying to creatively get into their wallets. We love. Because it’s who we are. So you can’t put a price on living free from who you are and loving others without reservation. It’s not even about our company or brand. The brand is just a vessel through which we do this. But our team does this in their own personal lives, too, when there’s no brand attached to it, often anonymously when not even their own name is at stake.

What’s the point of being in business if we have to hide who we are and beat the same drum as everyone else? Why would we spend the grand majority of our productive time hiding our values, our identity, and ultimately, the things that really set us apart from the rest? It’s like singing the same song as everyone else: It’s certainly not going to get you noticed, and it’s not embracing the reality that you, as a brand, have your own song to sing. Sing YOUR song. Be honorably dissonant from the rest.

And if you do, you’ll find that you either learn a lot about how you can improve or you’ll gain some hardcore raving fans, which are the hardest kind to come by.

So when you are having a brainstorming session trying to think about your next big-budget marketing initiative, first stop and think about your company culture. How do you represent that culture? You most likely can’t do that with an ad. Ads only talk about WHAT you do, not WHO you are. And if you do talk about who you are, it sounds cliche (like “we have great customer service” for example). Who you are is far more important, because we all have competitors that do what we do. Represent your culture and THAT will set you apart. And at the end of the day, isn’t that what marketing is supposed to be?

Doesn’t seem so crazy now, does it?

Happy kid with swagAdult superheroesbaby superheroLouie and Godiva

Magento Releases 2.1

Rob Tull, Classy Llama’s Director of Solutions, discusses the Magento 2.1 release “Magento 2.1 greatly improves the search experience for Magento 2 stores. It also gives marketers and content creators a greatly expanded feature set for creating and previewing content. You’ll have the ability with Magento 2.1 to directly manage marketing campaigns including multiple components and preview the impact of those campaigns ahead of their actual launch. It also makes the process for customers to pay with PayPal much simpler, reducing barriers to conversion.”

Highlights of Magento Enterprise 2.1:

Behind every great shopping experience is a team of innovative marketers and merchandisers. They optimize website content, merchandise products, and create awesome marketing campaigns and promotions. But what if you could empower your team to create new shopping experiences faster and easier than ever before?

Magento Enterprise Edition 2.1 gives you that power.

  • Supercharge sales and improve productivity like never before with new Content Staging and Preview
  • Drive Sales and Improve Productivity
  • Boost Conversion Rates
  • Simplify PCI Compliance
  • Scale for Growth
  • Improve Your Management Experience
  • Deploy in the Magento Cloud

For more detailed information, read here.

Deploying Magento 2 Using Capistrano

This post was originally posted on David Alger’s blog.

Overview

This article will cover how to use the capistrano-magento2 Capistrano Gem (created by our very own David Alger) to deploy Magento 2 to stage and/or production servers.

Capistrano is a tool used to run scripts on multiple servers, typically with the purpose of deploying code changes to those servers. Capistrano works well with both single node deployments as well as multiple node deployments that include separate application and database servers sitting behind a load balancer. When you use Capistrano, you get a lot of functionality “for free” and you only need to implement scripts to handle your application-specific deployment steps.

The Magento community has been using Capistrano to deploy Magento 1 for many years. There are a couple of Capistrano Gems for Magento 1 (capistrano-magento by Peter Rhoades and Magentify by Alistair Stead). However, since Magento 1 was fairly simple to deploy (compared to Magento 2), many merchants and agencies didn’t use a deployment tool like Capistrano. However, Magento 2’s deployment requirements are greater and it is necessary to have some sort of scripted process to deploy Magento 2 updates. Rather than building your own deployment scripts from scratch, it makes sense to use an open source community tool that is time-tested and used by many developers.

A Capistrano deployment can be initiated from any machine with Capistrano installed and the proper configuration files in place. When Capistrano deploys changes, it connects via SSH to the configured server(s) and runs the necessary commands to deploy a new revision of the project. The typical workflow is to run the deploy command from your local development machine. Deployment configuration files are typically committed to the Magento repository. That way, any developer working on the project can deploy changes to a configured environment assuming they have the appropriate SSH access.

Prepare your Magento 2 project/repo

This article assumes the following:

  • You’ve chosen the “Composer metapackage” method of installing Magento.
  • You have a copy of Magento 2 that you’ve installed locally (or on a non-Capistrano enabled stage server) and you’d like to deploy it to the stage and/or production environments using Capistrano.
  • You have a Git repo that contains composer.lock and composer.json files that were created when you installed Magento using composer create-project. Your .gitignore should look something like this: magento2-community-edition/blob/master/.gitignore See the first few paragraphs of Alan Kent’s blog post for more details regarding this project setup approach.
  • You have a Magento 2 database dump that you’re able to import into the server(s) on which you’re going to deploy to using Capistrano. capistrano-magento2 does not support deploying a Magento 2 application from an uninstalled state and assumes a working database and the app/etc/env.php and app/etc/config.php files exist on the target environment (more on this later).

Installation

To install Capistrano, run this command:

$ gem install capistrano

See this page if you run into issues: http://capistranorb.com/documentation/getting-started/installation/

To install capistrano-magento2, run this command:

$ gem install capistrano-magento2

Install Capistrano in your Magento 2 project

Follow steps 1-3 in this section of the
capistrano-magento2 readme. Once you follow these steps, the tools directory in your Magento 2 project should look like this:

.
└── tools
    └── cap
        ├── Capfile
        ├── config
        │   ├── deploy
        │   │   ├── production.rb
        │   │   └── staging.rb
        │   └── deploy.rb
        └── lib
            └── capistrano
                └── tasks

I recommend committing these files to your Magento 2 Git repo.

Prepare your application server(s)

Before you deploy, you need to prepare your stage and/or production environments. For the purpose of this article, let’s assume that you are going to deploy Magento 2 to two environments:

  • www.example.com
  • stage.example.com

Classy Llama uses Capistrano to deploy to both production and stage environments. While we could get away with deploying to stage manually (especially if stage is running in developer mode, which I don’t recommend), using the same deployment process in both environments ensures that your stage environment is an accurate reflection of production.

For the rest of this article, we’re going to talk about deploying to the stage.example.com environment, but the steps will be identical to the production environment. Here is an example of the commands that you would need to run to prepare the stage.example.com environment:

$ ssh [email protected]
$ cd /var/www/html
$ mkdir -p shared/app/etc
$ touch shared/app/etc/env.php

The capistrano-magento2 gem deploys files using the ownership of the SSH user that is used to connect to the server. In order to avoid permissions issues, you should ensure PHP and your web server is running as that user. While it is considered best practice to run your stage and production sites on separate servers, Capistrano doesn’t care about this can be easily configured to deploy stage/production to the same server by changing the config values in the tools/cap/config/deploy/*.rb files.

Edit the shared/app/etc/env.php file and add the necessary settings (DB credentials, etc) and ensure a proper app/etc/config.php file is committed to your repository (this file is created when bin/magento setup:install is run). Now import the Magento database and update the necessary values in the core_config_data table to reflect the new URL.

Configure your web server to use /var/www/html/current/pub as the document root. If your web server is running Apache, make sure you have mod_realdoc installed and configured to avoid issues with symlinked deployments and the Zend Opcache. If your web server is running Nginx, make sure your FastCGI proxy configuration is using the $realpath_root variable instead of $document_root for both SCRIPT_FILENAME and DOCUMENT_ROOT params sent to PHP-FPM.

fastcgi_param  SCRIPT_FILENAME  $realpath_root$fastcgi_script_name;
fastcgi_param  DOCUMENT_ROOT    $realpath_root;

First deployment to stage

Now you can deploy Capistrano to your server. On your development machine, run this command in the tools/cap directory:

$ cap staging deploy

When you run that command, Capistrano will verbosely report on its progress. Here is a summary of what Capistrano does in this process:

  • Creates a new /var/www/html/releases/<TIMESTAMP> directory for the new release
  • Checks outs the latest copy of the develop branch (the :branch value specified in staging.rb)
  • Symlinks the :linked_files and :linked_dirs into the new release folder
  • Runs composer install in the release directory. This will download and install the dozens of dependencies declared in composer.lock. Composer caches packages, so subsequent deployments should be faster than your initial deployment.
  • Changes directory/file permissions in the new release folder to 770/660, respectively (these may be updated in future releases of the capistrano-magento2 gem to be further secured by default, and also allow for greater configurability).
  • Runs bin/magento setup:static-content:deploy and bin/magento setup:di:compile-multi-tenant
  • Once all of those commands run, the new release directory will be nearly ready to be switched to the “current” release. However immediately before doing so, the current release (the “current” symlink) will be put into maintenance mode using bin/magento maintenance:enable. The reason this is done is because the bin/magento setup:upgrade --keep-generated command will be run immediately after the site is put into maintenance mode. This is important because any new or updated modules will have their version numbers updated in the setup_module table and if the current release sees that its modules aren’t in sync with that table, it will throw an error.
  • Capistrano deployments are atomic, so if any of the commands up to this point failed, the deployment will fail and the /var/www/html/current symlink will continue to point to the release directory it was pointed to before you began the deployment.
  • At this point, the /var/www/html/current symlink will be switched to point to the new releases/XXXXXXXX directory.
  • Flushes cache via bin/magento cache:flush

The deploy process implemented for deployment of Magento 2 by the capistrano-magento2 Gem can be seen in lib/capistrano/tasks/deploy.rake

If you completed all of the previous steps properly, you should now be able to browse to http://stage.example.com and see your newly deployed Magento site. When you want to deploy future code changes to stage, ensure the changes are in the develop branch and run the cap staging deploy command again to deploy the latest changes to stage.

Once you deploy to stage, the /var/www/html directory on your stage server should look something like this:

.
├── current -> /var/www/html/releases/20160526030129
├── releases - this directory will contain the latest X releases. X is defined by :keep_releases which defaults to 5
│   └── 20160526030129
├── repo - this is a bare clone of your Git repository
├── revisions.log - a line for each release with the commit hash, release date, and username of the machine that deployed
└── shared - this is a permanent directory that contains the files/directories referenced by :linked_files and :linked_dirs
    ├── app
    │   └── etc
    │       └── env.php
    ├── pub
    │   ├── media
    │   └── sitemap.xml
    └── var
        ├── backups
        ├── composer_home
        ├── importexport
        ├── import_history
        ├── log
        ├── session
        └── tmp

Now that your stage deployment is configured, follow the same steps to setup your production deployment.

Additional capistrano-magento2 Features

In addition to deploying changes, the capistrano-magento2 Gem also supports a number of Magento maintenance commands. Run cap -T in the tools/cap directory to see a list of commands. Many of the commands are simply aliases for bin/magento commands. The benefit of running them from Capistrano is two-fold: You don’t need to SSH into your stage or production server in order to run the command, as Capistrano handles that for you. Secondly, if you have multiple application servers, you can run a single command in all of your application servers simultaneously. These are the commands available in version 0.2.4 of capistrano-magento2:

cap magento:cache:clean                   # Clean Magento cache by types
cap magento:cache:disable                 # Disable Magento cache
cap magento:cache:enable                  # Enable Magento cache
cap magento:cache:flush                   # Flush Magento cache storage
cap magento:cache:status                  # Check Magento cache enabled status
cap magento:cache:varnish:ban             # Add ban to Varnish for url(s)
cap magento:composer:install              # Run composer install
cap magento:indexer:info                  # Shows allowed indexers
cap magento:indexer:reindex               # Reindex data by all indexers
cap magento:indexer:set-mode[mode,index]  # Sets mode of all indexers
cap magento:indexer:show-mode[index]      # Shows mode of all indexers
cap magento:indexer:status                # Shows status of all indexers
cap magento:maintenance:allow-ips[ip]     # Sets maintenance mode exempt IPs
cap magento:maintenance:disable           # Disable maintenance mode
cap magento:maintenance:enable            # Enable maintenance mode
cap magento:maintenance:status            # Displays maintenance mode status
cap magento:setup:di:compile              # Runs dependency injection compilation routine
cap magento:setup:permissions             # Sets proper permissions on application
cap magento:setup:static-content:deploy   # Deploys static view files
cap magento:setup:upgrade                 # Run the Magento upgrade process

Reverting

Capistrano supports reverting to previous releases using cap deploy:rollback. This can be useful if you mistakenly deploy code to an environment and want to immediately revert it. However, if you want to use this feature, there are some things you need to be aware of:

  • If your newest release contained new extensions or newer versions of extensions, you’ll need to manually adjust the values in the setup_module table or else you will get errors.
  • If a deployment fails or you cancel it, the releases/<TIMESTAMP> directory for that failed release will still exist. If you rollback, Capistrano will use the most recent release directory, even if it was not a successful deploy.
  • After reverting, you’ll need to run the cap magento:cache:flush command
  • I’ve only used this command once, so there may be other things you need to do that I’m not listing here.
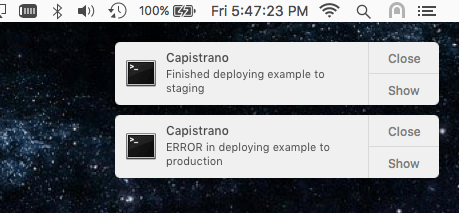
OS X notifications

If you’d like to get OS X notifications of successful/failed deployments, follow the steps outlined under “Terminal Notifier on OS X” in the README

magento2-capistrano-notifications

Review pending changes before deploying

If you want to see what changes you’re about to deploy to an environment, you can add the capistrano-pending gem as a dependency. Add this line to tools/cap/Capfile:

require 'capistrano-pending'

Now, cd to tools/cap and run these commands to see pending commit messages and file changes (respectively):

$ cap stage deploy:pending
$ cap stage deploy:pending:diff

Flushing Varnish cache

If you’re using Varnish to cache your static assets, you’ll need to take some extra steps to get capistrano-magento2 to flush Varnish. I’m not going to cover those steps in this article, but if you’d like to learn more, feel free to post a comment below.

Summary

It can take a while to get familiar with and setup an automated deployment system, but due to the amount of effort required to manually deploy changes to stage/production environments with Magento 2, the payoff should be worth the investment. Especially because deploying with Capistrano ensures a minimal amount of site downtime when deploying.

If you have any questions or feedback, I’d love to hear them in the comments section below.

IRCE Recap 2016

During the week of June 6th, we attended IRCE (Internet Retailer Conference + Exhibition) in Chicago, IL. After conferences and trade shows we typically select one person to write a recap of the event. As we talked over our experiences post-IRCE, we realized how different each of our perspectives and key takeaways are. So rather than a one-person view, below you have 5, ranging from various levels and departments within Classy Llama.


Kurt Theobald, CEO

Based on my informal survey at the conference, the industry is not innovating very quickly.  It’s not stagnant, but the breakthrough innovators are on the periphery, and they’re designing solutions that are either solving problems that are too small and so not worth merchants’ time or that don’t have a path to gain critical mass due to logistical problems.  With that said, the central players continue to slowly, incrementally improve their offerings, which is important; fresh, breakthrough innovation is always built on the backs of that slow, incremental innovation.  However, I foresee a shock wave of innovation coming over the next three years that will shake up the industry and increase its footprint substantially.

Brandon Urich, Solutions Architect

I really enjoyed getting to know the team a little better. I got to connect with other companies in the ecosystem and discover some new solutions that could be beneficial to our customers. It was nice to have some current clients stop by, as well as talk to merchants in need of something to see if we could help them.

Rob Tull, Director of Solutions

It’s always impressive to me every year to see just how much the IRCE show continues to grow. There were more service providers than ever this year, along with what I perceived to be an increase in “core” providers.

The eCommerce space continues to mature and I see that through the increase of vendors offering key services like email, order management, warehouse management, and more. I felt like this year that there were more vendors I found interesting and would like to learn more about than ever before.

It’s also interesting to see how the market’s perspective on Magento is evolving. This year, everyone was fully aware of Magento 2 and talking a lot about what it means. There were a lot of questions about it and it was great to be able to provide a lot of insight to folks about the opportunities we see. I look forward to seeing how this has settled in by the show next year.

Paul with IRCE guestsRob at IRCEHappy Gino chatting

Ben Leach, eCommerce Consultant

Our powerful branding was also enlightening for me – compared to Imagine (where everyone already knows who you are as we have been a part of the Magento ecosystem since the beginning) I didn’t expect our brand to be as well-known as it was.

Lots and lots of companies approached our booth regarding partnerships – this emphasized the power of our branding as well as our status within the Magento community – again – I didn’t expect this at IRCE

Ashlee Colliver, Marketing Strategist

This being my first conference with Classy Llama, there were so many great experiences and takeaways. However, the biggest by far was seeing how our brand and culture translates to the public. It is something that is often talked about internally but to witness it first hand was pretty amazing. From the buzz about our swag to general interest in our services, I saw the joy people have for our company and the love we give back in return.

I also enjoyed talking with service providers, including competitors and asking them how they view the industry, the trends, the new big players and the technology. What a gift it was to gain knowledge from such a variety of people.

My last big takeaway was having the opportunity to speak directly with some of our clients and partners, which I do not have the chance to do on a regular basis. I bring back with me a deeper understanding of who Classy Llama is in the ecosystem and many ideas on how we can project who we are in person to create a bigger digital footprint culturally.

If you attended IRCE, we’d love to hear what your key takeaways were!

Why Magento 2?

Magento 2.0 was announced January 2015 and officially launched last November. Since that time, the hardcore Magento users, agencies, and partners have been plugging away. For those of us dedicated to the Magento ecosystem, it’s been a fantastic experience with some much-needed improvements.

But how do you, as a merchant, know if it’s right for your business? And – is the only reason it’s being talked about because it’s new, or is it because it’s really that good? Let’s delve into that a little deeper, not from a development standpoint, but from a “Why as a merchant should I care?” standpoint.

The truth is, what really makes Magento 2 so great is for developers, but when things are easier (and faster) for them, it will ultimately cost you less in the long run. But to make such a big switch (updating your website either from Magento 1.X or to a new platform entirely) you want to know how it affects the customer experience and in the end, your bottom line right?

Amazing Performance and Scalability

Compared to Magento 1, merchants can process up to 39% more orders per hour and provides up to 51% faster guest check out response times with Magento 2. It also delivers nearly instant response times for catalog pages, while enabling up to 66% faster add-to-cart server response times.

Best-in-class Checkout Experience

On Magento 1, with every step, such as adding a product to the cart, the page has to reload. Every second your customer feels a delay is a time they have to change their mind about the purchase.

With Magento 2, the need to reload the entire page with each change has been removed. Also, there are only two steps to complete the checkout process now as well. Customers no longer have to register to check out, but can do so afterward, removing a barrier to conversions. In addition, shipping rates load automatically once an address is entered.

Mobile-first Responsive Design

Poor performance and bad user experiences on mobile devices frustrate consumers and make them less likely to purchase from your store. Magento 2 fully embraces responsive best practices with its modern front end architecture. It is designed in a mobile-first context, ensuring phone and tablet users have a fast and intuitive experience.

Modernized Admin Panel

If you currently use Magento 1, you know that changing the grid views (adding or removing columns, pre-selecting filters) involve hours of customizing. With Magento 2 this can all be done natively with a drop-down menu. Also, the admin dashboard is now tablet-friendly, streamlined, and easier to navigate.

New Features

Magento is investing all of their development efforts on adding new features to Magento 2, not Magento 1. Meaning, if you are not on Magento 2, you will be lagging behind your competitors when it comes to new solutions and technologies.

Improved Upgradeability

With Magento 1, an upgrade from one version of 1.X to a higher version resulted in a large, time-consuming project. Though the jump from Magento 1 to 2 is significant, upgrades from that point will be much easier, and therefore more cost-effective.

Given what you now know about Magento 2 – should you re-platform? Maybe. If your site is in need of an upgrade as it is, then Magento 2 is a clear choice today. But should you switch just to switch? Probably not – Magento 1 will continue to receive support until 2018, so if your site functions well and provides all of the features you currently need, you could wait for several months before beginning the re-platforming process. Keep in mind that there is some risk in waiting. At the point that Magento stops offering support for Magento 1, there will most likely be a flood of companies wanting/needing to move to Magento 2. When that happens, agencies will be bogged down and project times will be significantly longer.

If your current site isn’t meeting your company’s (or customer’s) needs, give us a call, we’ll answer any questions you have and help you decide if Magento 2 is the right choice for you now.

Get more information about Magento 2 here.

The Importance of A/B Testing

A/B testing (also referred to as split testing) is the process of testing and comparing two different versions of a web page, to determine which “performs” better. Testing uses real-time data and statistics to help determine the effectiveness of proposed changes, resulting in a site that is fully optimized.

The Testing Process

  1. Ask something.
    Determine the question you want to ask.
    Ie: “Why is the bounce rate on X page so high?
  2. Collect relevant data. 
    Utilize analytics tools to determine what pages and content assets are doing well.
    Understanding your customer behavior will help determine which elements to test.
  3. Identify and document your goals.
    Determine which conversion goals will be used as metrics to measure the test’s success.
    Goals can be simply clicking on an add, purchasing a product, completing a contact form, etc.
  4. Formulate a hypothesis: 
    ie: “Updating the graphics on this page will decrease the bounce rate”.
  5. Create test variations. 
    There are multiple ways to create unique variations of each page. You can utilize A/B testing software such as Optimizely or VWO (Visual Website Optimizer).
  6. Put it to the Test: 
    Launch your A/B test in which the variation (version B) has implemented the proposed changes.
    Test this page against the original, and measure each page’s bounce rate.
    Visitors must randomly be directed to either page.
    Analytics tools will track their behavior to determine how well each page performs.
  7. Analyze results and draw conclusions: 
    If the variant page does better than the original, your test is a winner! If not, keep testing other variables until you reach your goals. Each test will reveal something different!

What to Test

The variables you decide to test will depend solely on your goals for the experiment. Once you determine what your end-goal is, the elements to test typically reveal themselves. Feel free to get creative and test subtle details. For a general rule of thumb, the table below lists out key variables to test.

The Importance of A/B Testing

A/B testing allows you to optimize your site on every level, making use of your existing traffic. It gives you an opportunity to make careful, calculated changes while measuring the impact on conversions. You eliminate the risk of guesswork and can prevent immeasurable damage to your site.

Testing one change at a time will help you pinpoint the root – or roadblock – to increasing conversions. You can continue consistently improving and optimizing your site, without the harsh repercussions of launching without being tested.

Things to Keep in Mind

As we’ve been testing, a few key lessons have stuck out to our team.

Always test the control and the variable simultaneously. Split your traffic between the two versions; otherwise, your results may be skewed.

Don’t read too much into the initial results. If you conclude too early, you may find that the initial results weren’t sustainable. You can find online calculators to determine your test’s “statistical confidence.” (Which tells you how credible and relevant your results actually are).

Allow the results to shape your strategy. Too often, we go into a test expecting a specific outcome; when it doesn’t happen that way, it’s easy to disagree with the results. Just remember that the overall goal is a better conversion rate, regardless of what your personal preference may be. Every test can have 3 results: no result, a negative result or a positive result.

Why Classy Llama A/B Tests

Classy Llama tests, because every good marketer does. We love to do good by our clients. One way we can do this is by analyzing our customers’ sites and running A/B test ideas to improve it.

Testing out ideas is important because what may have worked for one site may not work well for another. There is no one right answer when it comes to the perfect mix for a good UX and good conversion rates. The only true way to know what works with your customers is to run a set of A/B tests and measure them against your current conversion rates.

A/B tests help you get to know your customers better and drives in providing them with the best UX. This, in turn, improves conversion rate performance and makes for a very happy client.

Contact Us